
Apple butter and thumbprint cookies are a seasonal staple, so why not have both? Together? This recipe uses an Instant Pot to quickly make the apple butter which normally would take many hours or at least overnight in a slow cooker. The buttery crunch of the cookie with the Fuji apple butter filling is a real treat! Fuji apples are very juicy, resulting in a lovely cooked down version of the fruit. They are also naturally very sweet, which allows you to use less sugar for this recipe. Perfect for gifting, a weekend project, or any dessert craving!
Ingredients:
Apple Butter:
- 6-7 Joyfully Grown™ Fuji Apples, peeled, cored, and chopped
- 1/3 c. apple juice
- 1 c. brown sugar
- 2 tsp. cinnamon
- ½ tsp. salt
- 1 tsp. vanilla extract
Cookies:
- 2 sticks of salted butter
- 1/3 c. granulated sugar
- 1/3 c. brown sugar
- 1 egg yolk
- 1 tsp. vanilla extract
- 2 ¼ c. all-purpose flour
- 2 tsp. cornstarch
- ½ tsp. salt
- ½ c. sugar for rolling
Icing:
- 1 c. powdered sugar
- 1 tbsp. milk of choice
Directions:
- Place all the apple butter ingredients into an Instant Pot. Select manual mode at high pressure for 8 minutes.
- When the time is up, vent and allow the unit to release any extra pressure before removing the lid.
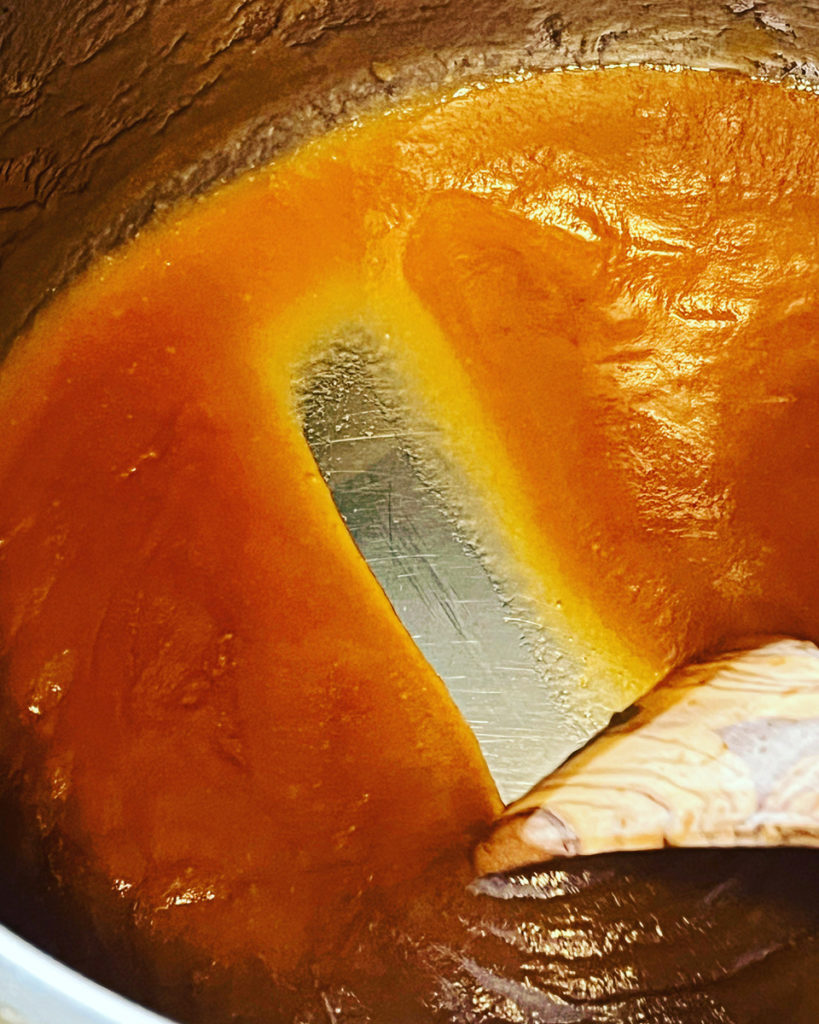
- Using an immersion blender or blender that can handle high heat, puree the cooked apple until smooth.
- Select “Sauté” mode and cook down until you can pull a spatula across the bottom of the insert, and it leaves a clean path. It will thicken as it cools!
- Transfer to a heat safe container and allow to cool completely before proceeding.
- Place butter into a medium sized mixing bowl and beat until creamy.
- Add sugars, and beat, until well combined.
- Add egg yolk and vanilla, beat well.
- In a separate bowl, mix the dry ingredients first, then add to the wet mixture and mix until well incorporated. The mix will be dry and crumbly.
- Scoop out cookie dough to form 1-inch balls. Roll in sugar and place onto a cookie sheet, spacing them at least 1-inch apart from each other.
- Gently press the center down to form a well with your thumb into each cookie ball. If they crack on the sides, simply press the crack back together.
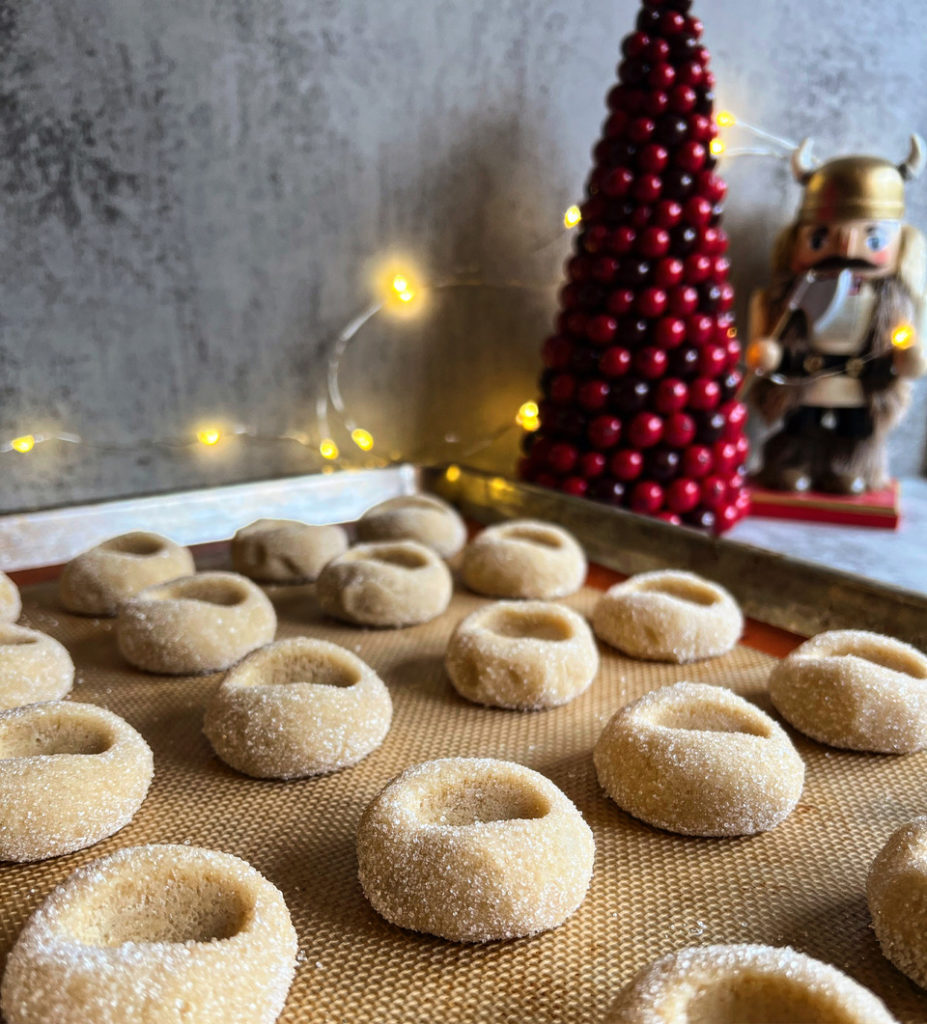
- Transfer the cookie sheet into the freezer for 30 minutes.
- Once the cookies have chilled, preheat the oven to 375°F.
- Spoon jam into each thumbprint cookie, filling to the brim, but not overfilled.
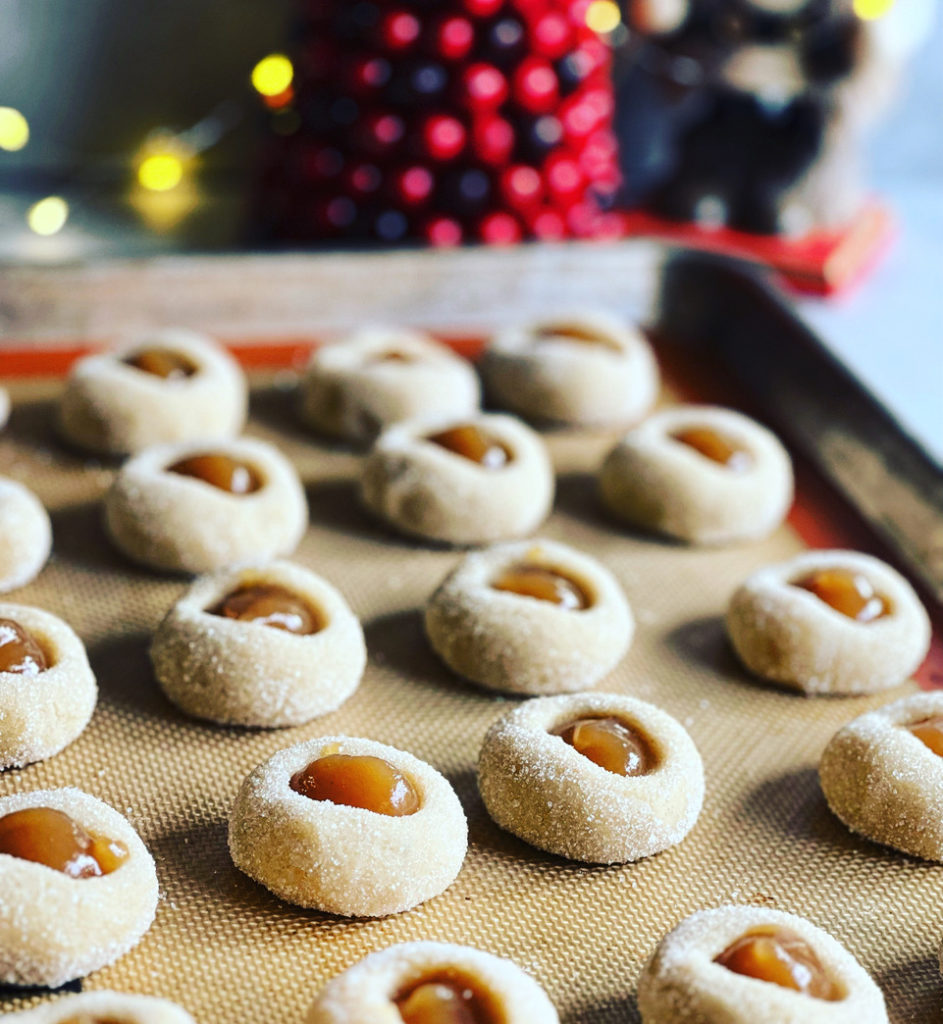
- Once the oven is preheated, bake the cookies for 12 minutes or until light golden brown around the edges.
- While the cookies are baking, make the icing and place in a piping bag or bottle.
- Allow the cookies to cool completely and drizzle with icing.

- Enjoy!

Recipe by Valerie Musser of @valeriesofcoursecatering & @whosagoodlizard